WoW! It’s been a crazy day, I learned so much my brain feels like it’s going to explode. In class we learned about the if command. We learned how we need to assign variables in the global variable first before making an argument. Depending on the outcome of the argument (true or false) the code will change and so will our image. I enjoyed working in groups as we are still new to this and every set of eyes counts. The intimate feel allowed me to ask my peers what they would do with the code or what they would change. I also liked working as a class because we all have different struggles with coding but we want to understand how things work to improve. In the homework, we got to see different variations of arguments, how a mouse pad works, etc. Attached below are the first five examples of code. I liked to be creative as I dabbled in adding extra code here and there.
Assignment 1 –
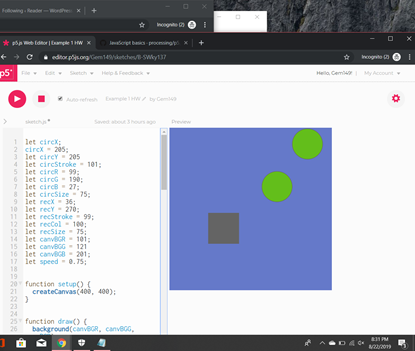
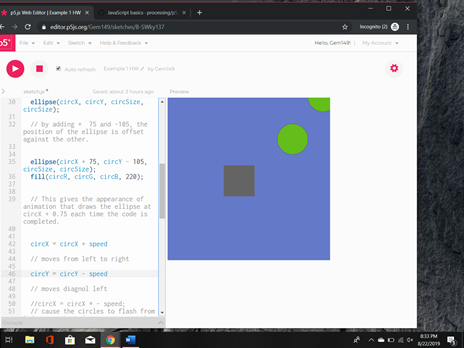

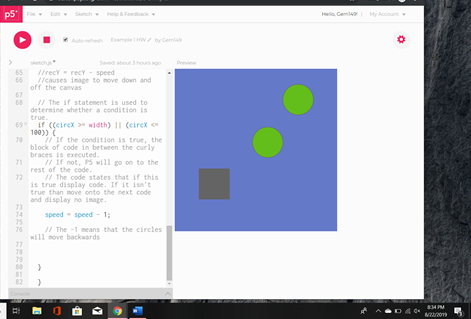
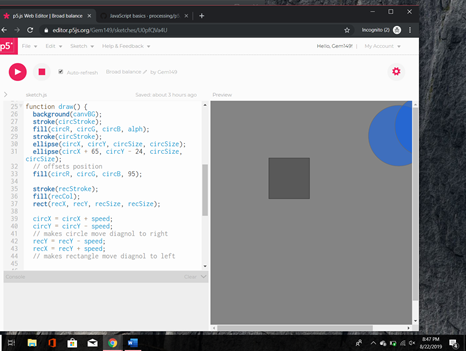
In example one, we learned about the if command. We learned that we must assign our global variables in order for our code to work. For learning purposes we declared the global variable at the top of our code. After we did that, we proceeded to creating our shapes, assigning color, and outline. We then assigned the speed of our shapes to the x and y axis. This will allow the shapes to move across the canvas. The last thing we did was assign the shapes to the if command. The if command in code tells the computer if this is done produce this. In our case we told the computer that if circX is greater than or equal to the width of the canvas or if circX less than or equal to one hundred take the variable speed and subtract it by one. This in turn would cause the image to move backwards as it reaches the edge of the canvas.
Example 2
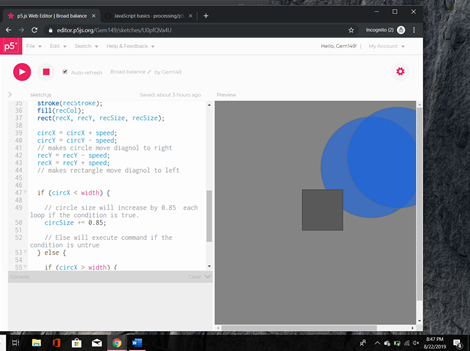
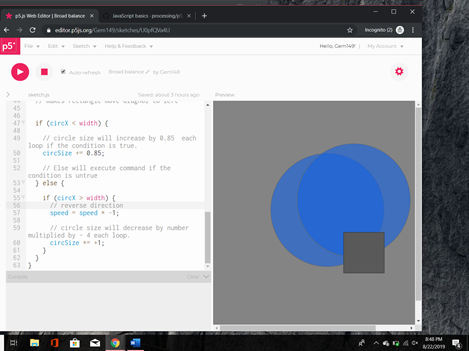
In example two, we learned about the if and else command. We learned that we must assign our global variables in order for our code to work. For learning purposes we declared the global variable at the top of our code. After we did that, we proceeded to creating our shapes, assigning color, and outline. We then assigned the speed to our shapes to the x and y axis. This will allow the shapes to move across the canvas. The last thing we did was assign the shapes to the if and else command. The if command in code tells the computer if this is done produce this. In our case we told the computer that if circX is less than or equal to the width of the canvas to change the circle Size to increase by 0.85. Now let’s talk about the else command. The else command is the opposite of if, for example the if command is supposed to do be true than command is executed. But if the command is false the else command will tell the code to do something else. In human terms, if the park is open we can go play. If the park is closed let’s get ice cream. When if is false the code associated with the command is ignored and the computer executes the commands listed under the else command. Now getting back to the example else if circX is greater than the width the speed will change to multiple by negative one. Essentially this would reverse direction if the statement was false. Then change the circle size to multiply by negative one.
Example 3, 3A, 3B
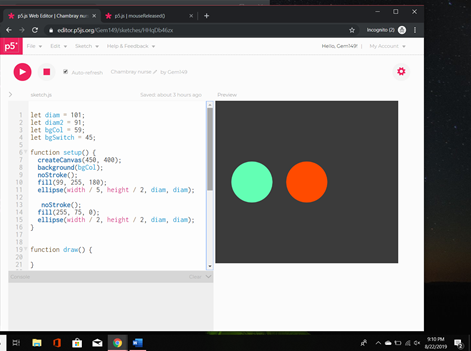

In example three we learned about the mousePressed and mouseReleased command We learned that we must assign our global variables in order for our code to work. For learning purposes we declared the global variable at the top of our code. After we did that, we proceeded to creating our shapes, assigning color, background and outline. We then set the shapes location by dividing the width and height by a number. This number will determine the shapes position by looking at the numbers from the createCanvas. It will then plot the circle on those coordinates before drawing the circle. After that we used the function mousePressed. When you click on the mouse the shape should change color and location. In this case the green circle should move to the corner and turn blue. The second circle I created which is orange has a function even if it doesn’t appear that way at first. Which leads me to the mouseReleased function. The mouseReleased function means that if I release my mouse something else should happen. In this case if I let go off the mouse my circle should turn purple and the background should change colors before taking it’s new position. Essentially, the mouseReleased changes the image as it is called upon when the command is called.
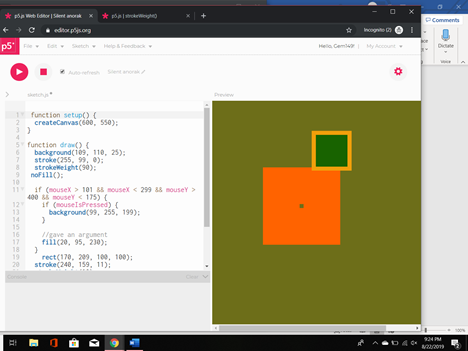
In example 3A we learned about mousePressed & mouseX and mouseY. In this example we created a background, stroke, strokeWeight, and no fill for our shape. We then set conditions in out if command to make the shapes move a certain way. The mouseX command holds the current horizontal position of the mouse relative to the canvas. The mouseY command holds the current vertical position of the mouse relative to the canvas. If touch was used instead of mouse input, mouse X and Y would hold the most recent touch point of x and y. In our example we are saying that if mouseX is greater than one hundred one and mouseX is less than two ninety nine and mouseY is greater than four hundred and mouseY is less than one seventy five than the background is the mouseIsPressed should change.
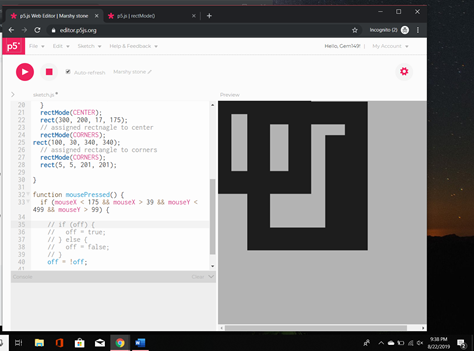
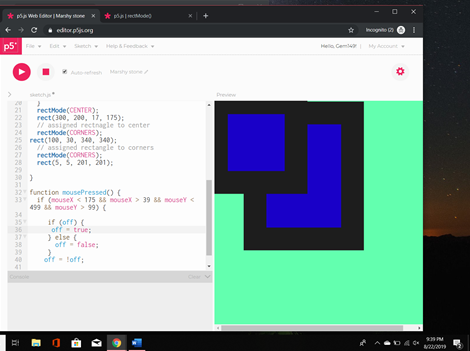
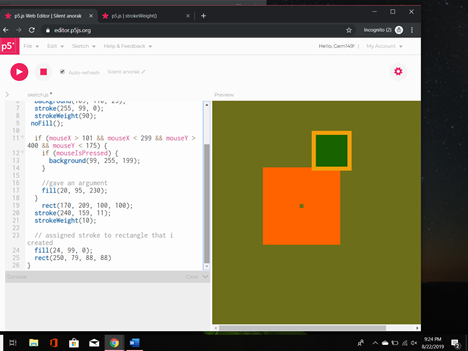
In example 3B we learned about using a variable to affect the outcome. We first assign variable off to true. What we are saying is that variable off is equal to the Boolean for true. Let’s move to the it and else command now. We are saying if the variable off is true let the background change to this color. If the variable off is false let the background change to this color. The next step is to create the next if statement. Before I move on just a quick recap about what mouseX and mouseY are. The mouseY command holds the current vertical position of the mouse relative to the canvas. If touch was used instead of mouse input, mouse X and Y would hold the most recent touch point of x and y. Now for the if statement, if mouseX if greater than two fifty and mouseX is less than three fifty and mouseY is greater than one fifty and mouseY is less than two fifty fill the background with these colors. The next thing we are doing is setting the location of the rectangle. So rectMode is the command to set the location of the rectangle. In reference to p5 rectMode(CENTER) places the rectangle in the center of the canvas whereas rectMode(CORNERS)sets the rectangle in the (CORNERS).Now we create our rectangles and place them under rectMode. Now we will utilize the function mousePressed followed by the if command. Quick recap mousePressed is called once after every time a mouse button is pressed over the element. Now to the if in our mousePressed, if mouseX is less than one seventy five and mouseX is greater than thirty nine and mouseY is less than four ninety nine and mouseY is greater than ninenty nine that off is true or else it is false. Outside the function we put off is equal to not true which makes it false hence displaying a different image.
Example 4
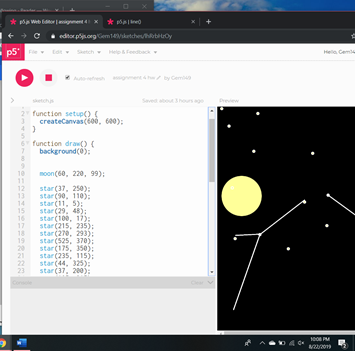
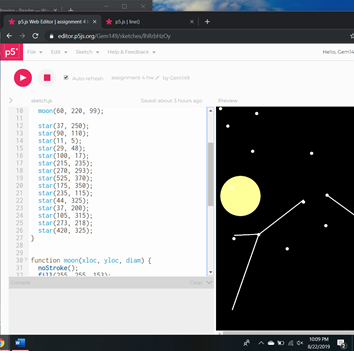
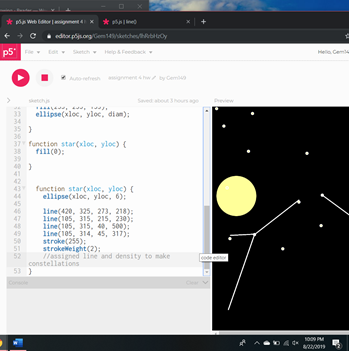
In example 4 we learned about creating functions and executing them. We learned what it takes to create and execute a file while being able to display the outcome. So first, we need to create a function, don’t worry about the process as in this case it is sometimes easier to start at the end and make our way forward. In this case lets start by making our functions. In this case we will call our function moon to keep it relevant to what we are creating. In the function moon we are going to put what arguments we want. So in this case moon has the arguments of xloc, yloc, diam. We are telling the function that moon will be using these arguments. Later when we put our function underneath the draw function for displaying our output we will enter these syntax. Moving along, within our function we will add the fill color of our moon, the stroke, and the shape of the moon itself. The condensed version of this will be how to create our stars. The image above has since had its code condensed to make life easier. The next function we will right is for our stars. See condensed code below.
function star(xloc, yloc) {
stroke(900);
point(xloc, yloc);
}
In this condensed code we will be using we create the function star. Within the function we also put the arguments we are going to be using. In this case we are using xloc, and yloc that we will eventually use to create our star. We then created our stroke which is our color of said star before creating a point using the xloc and yloc. Now that we created both functions we are going to go back to function draw. In here we will put moon function along with the xloc, yloc, and diameter. We should than see our moon on the canvas. We will then add our star command as many times as we want to create stars. Just remember not to forget your arguments which consists of xloc and yloc. For fun I added inside the function star lines to make constellations. These lines as per p5 reference must include four points hence the reason there are four numbers in each line.
Example 5

In example 5 we learned how to create a function a log the output in the console.log. In this case we created a function named milesToKm(miles). We then proceeded to assign the variable km – miles + 1.2; within the function. This will take the outcome of km and return it to the screen. We then moved to setup and created a local variable called km and assigned it to our function milesToKm before assigning the number of miles. We then tell the console to log the results which are then displayed to us. We than create another local variable named km2 and assign it to our function milesToKM before assigning the number of miles. We than tell the console to log the results which are then displayed to us. We also say in the function setup to log the milesToKm token with the miles from our other function with another 99 miles. By executing these commands in the setup they will not loop rather they will only execute once when the program is run.
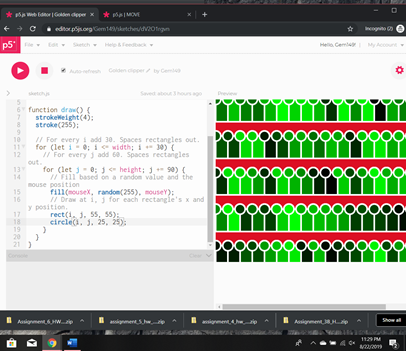
Example 6
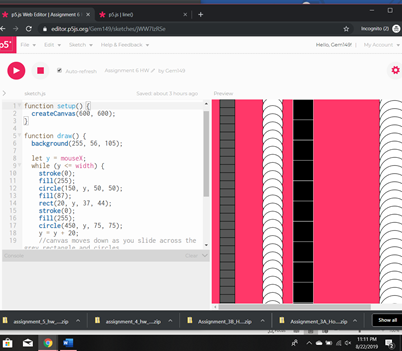
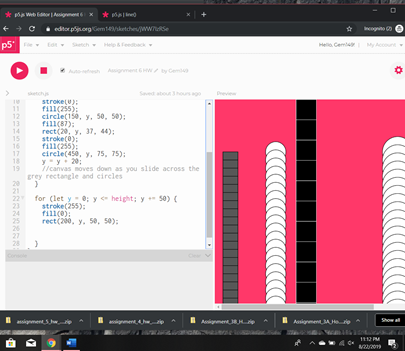
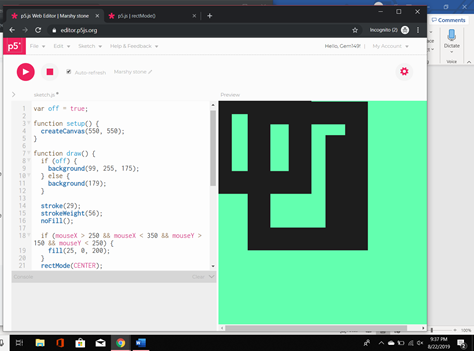
In example 6 we learned about the for loop. For condensing purposes I will only go over one of the shapes I created. The first thing to do is within draw select you background. Once that’s created we can start working on our shape. In this case we are going to make a variable y and set it to the command mouseX. Quick recap about the mouseX command – the mouseX command holds the current horizontal position of the mouse relative to the canvas. So before we go forward lets talk about the while loop. The while loop employs a Boolean test that must evaluate to true in order for the instructions in the curly brackets to be exhausted. Back to the while command, we are saying that if y is less than or equal to width do the following fill the shape, change the outline color, and create the circle. You are then going to type y = y + 20 or any number. This will make the shape move down the y axis so much. So before we go forward lets talk about the for loop. The for loop is used to check for certain conditions and then repeatedly execute a block of code as long as the conditions are met. In this case we are saying the variable y minus zero. If y is less than or equal to the height than add fifty to y. If this condition is correct than add this outline, fill, and create shape. If not then these commands will be overridden and dismissed. This will than appear in the continuous loop.
Example 7
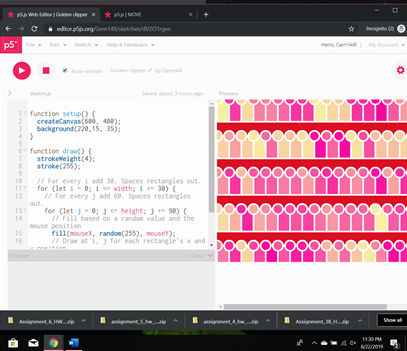
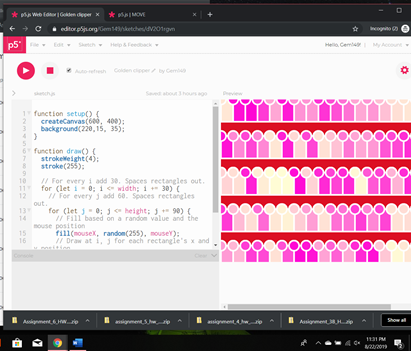
In example 7 we learned about a nested for loop. A nested for loop is a for loop with another for loop. The for loop will still run like any other for loop multiple times. In this example we use industry conformation for x and y which in this case is i and j. In the first for loop we establish the variable i and set it to zero. We than add to the argument and say that i is less than or equal to the width. If that is true add thirty to i. In the nested loop we are doing the same but for the variable j. We are establishing j and assigning it to 0. We the add to the argument by saying that j is less than or equal to the height. If that is true than we want to add ninety to j. Inside the nested loop we use the fill command and add three arguments mouseX, random(255), which assigns a random number ranging from 0 to 255, and mouseY. What we are saying is that the fill of the shape can be any color and will change as the mouse moves along the x and y axis. Last but not least we are creating out shapes. Remember that our i and j are the same as x and y. In this case a circle and rectangle have the same number of coordinates. An x, y, width, and height. So for our example for both shapes we will use i, j, and two numbers. Typically, I prefer them to be the same to make the shape look symmetrical but that doesn’t have to be the case. Now let’s see the result, you may notice that their is significant spacing between the shapes and background. That happens when you add or subtract in you for loop. Essentially, for the i or j will change due to restructure of the axis.
