P5JS – Homework and Class Recap

I’m glad to say that I completed Day Two!

I learned so much today that my brain is a little boggled. But that’s okay, with a little more practice I’ll be a pro in no time. Anyway, to get back on track I’m going to do a quick recap about what I learned today.

Tool 1 – In class today we learned about hyper. Hyper is a software that allows users to access Linux/Unix terminal across all platforms. It doesn’t matter whether your an avid Windows user or a Mac Professional. Anyone can use this software, which is extremely helpful for collaborations.

Tool 2- We touched briefly on the brew command. What the brew command does is update the different applications you have on your computer all at once. However, it doesn’t allow you to update xchange which must be done manually. For Mac their is a website called Home Brew that allows you to copy the code and paste it in ruby. For Windows you will need to look for a brew in Github.

Tool 3- Github. Github is an open code software repository that allows users to access and store their own codes publicly. These codes range from regular notes, all the way to program codes for different projects you may be interested in. We also learned that their are ways to protect your work but usually for GitHub that means that you would have to pay a small fee as it is typically an open source for all users. However, by posting their code online to the public, it allows companies to trouble shoot and collect data about users and their products.

Tool 4- P5js- We explored P5js and learned how to understand the grey scale. The gray scale ranges from 0-255. Zero being devoid of any color but black and 250 being the closest to white. We messed around with the functions such as backgrounds and fill to understand how they work. We even went as far as creating a canvas and adjusting the colors along the grey scale.

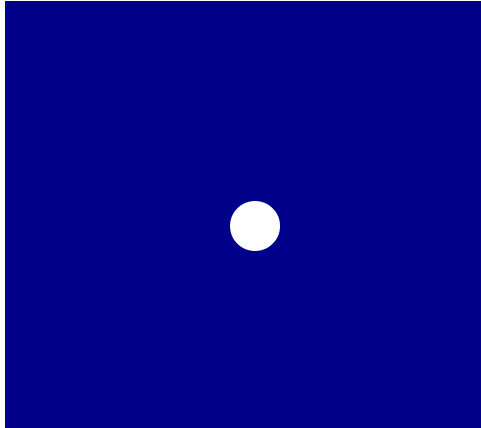
Tool 5- Creating a background. For Homework, we dabbled in creating a background. Attached below, you will see the mixture of colors that I played with. The first code resulted in a navy blue. The second code resulted in a violet like pink. And my final color (for fun) was trying to get as close to the p5 logo as possible. The more you played with the color the more dominant your colors became.

Tool 6- Creating a shape and filling the color. For Homework, we dabbled in creating a background and adding shapes. We referenced the p5js to add shapes, fill them, and dabble with the alpha command. As far as I can tell, the Alpha command is the most dominate color in the range of 0-255. When added to the fill command it will make the shape appear translucent. Attached below, you will see the result of the shapes and backgrounds meshing.

Tool 7- Creating a shape. As part of the homework we created a canvas and added a variety of shapes in all different positions along the x and y axis. These shapes give life to the empty canvas.

Tool 8- Adjusting the order of code. The last part of our homework was to adjust the coding and to see what would happen. To test this, I removed the function setup and instead started with the function draw.

What I noticed at first glance was a small square that could not be seen. What I realized was that it appeared as almost as if their was no solid canvas as x and y were not defined. Which in turn caused part of my shapes to disappear from view. It almost looked like the shapes in the crowded space had no where to go because the canvas was undefined. The area that was displayed was no bigger than that off a small uploaded photo you would see in a profile image on a website.

When I returned the function for setup back to it’s original order, the canvas appeared underneath the shapes. It almost appeared as though someone slide a piece of paper underneath the shapes allowing the shapes to be displayed in their entirety.

As per vice versa of the command order, if you kept the setup as your main function your canvas would appear first allowing you to create the width and height for your masterpiece. From their you would then draw your shapes and see them in it’s entirety scattered across the page. By reversing the order your shapes would not be displayed in their entirety as you have not given the x or y coordinates for your canvas.

Command Line

Today, in class we learned about the command line (Windows) / Terminal (MAC). The command line is a user interface that is strictly written in code. The command line lacks the GUI (Graphical User Interface) that we normally see when we move our way through the computer.

As you can see in Windows you hit the logo key and r. Then enter cmd to access the command line.

In class we learned the basics of how to create, view, change, and remove a directory. A directory is another word for a folder. Inside that folder you may find a document.

But first we need to check the list of files and directories on file.

In class we did this with the ls command. However, when I try to do it using Windows, you get an error. So, instead I typed in help. The help command proceeded to show me my options.

Taking my chances, I typed in dir. Well, would you look at that… their are my directories.

From here, I changed into my Desktop directory and created a file.

To do this, I will use mkdir G_M.

Now, I will demonstrate how to get into the folder and create a file.

So, now I will change into the directory and create a file. To create a file I needed to look at the link below.

https://www.wikihow.com/Create-and-Delete-Files-and-Directories-from-Windows-Command-Prompt

Using the cmd to create a file was not as straight forward as I thought it would be, requiring me to search for references.

Now, I will check that everything went through properly. To do this I will use dir /s. This extension allows me to see into the sub-directory and files of the parent “root” directory.

From the little bit of coding I learned in the past, the additional “syntax” allows extra features to the original code itself.

No matter, on to the hard part… how do we delete the files and the directories?

Now, I know this will vary for the MAC terminal but… I’m sure they are pretty close.

Let’s figure this out, starting with the help command. So from what I could find, it says I can use the del command.

As we can see… it worked. Though, I wonder if i did del /a would it have deleted them? I know there is also a way to del files just based off of the ending of the text file but…. my brain needs a refresher first. Anyways… onto the next step, lets delete this folder. Yay!

As we can see in order to remove the directory, I needed to exit the directory. So, I used the cd.. to go back to the parent directory . Once back in the root directory I checked that G_M still was listed as a sub directory. I then applied the rmdir command to remove the directory G_M. To make sure everything was successful, I checked the directory using dir /s. As you can see nothing remains under the directory of Desktop. Well there you have it… a quick recap of what I learned today.

I have posted above the wiki how for CMD for Windows as a reference. Also below you will see the most common commands form cmd as a reference. I also used as reference to syntax and how to incorporate it into your cmd later on.

https://www.thomas-krenn.com/en/wiki/Cmd_commands_under_Windows

https://docs.microsoft.com/en-us/windows-server/administration/windows-commands/cmd

P5JS

P5JS is a Java Script library that is used in creative coding.

P5JS is a beginner friendly software used to help learner’r program interactive, graphical applications, through visualizing a creative, user friendly environment.**

It allows you to create and animate different objects using code. You can create shapes, forms, color, etc. Essentially, anything is possible with a little imagination!

It is used by a wide variety of users. Some are aspiring artists, educators, and even computer programmers!

The key thing to remember is that even though the objects of your design may appear in real time for the user/viewer a serious amount of dedication and coding are going on behind the scenes.

I stumbled across a great article that shows how someone might go about creating a code and relaying it through P5JS.

I have attached a few pictures from the link above.

From the picture above the coder was creating a HTML file to link with the J5PS. This file will be what will allow the design to be possible.

The next step is to create your canvas!!!!

According to the resource link, I provided as reference, you will now enter the coding required to create a circle. Once complete, you should see a circle. A key thing to remember is to test the result but pasting the HTML in your browser.

Whew! All that hard work… is wearing me out. But don’t worry it will pay off… BAM! Your dedication led to this…

Isn’t it adorable… your very own circle.

This is the byproduct of all your coding. A user can now see a circle and whatever background you chose! Compared to what you may have written in java the user only see’s the outcome of your dedication. An image… but that’s not all. We can adjust that image by adding motion.

Now, in order to add motion you will need to make adjustments to your original coding. In this case the creator wanted to make the image move from top to bottom.

The creator created a loop to allow the circle to constantly move forever up and down. But what fun would that be if we didn’t give life to more circles…

The creator of this eclipse added some more code that would allow more dots to be created and move infinitely around the canvas.

The final product results in multiple shapes and movements across the HTML file.

What I learned from the article is that the coding is the foundation for the HTML to create an image. The image is orchestrated to work with a processor to create an image. In this case the P5JS is the catalyst for the imagery to mesh with the java scripting to create an image.

*All rights reserved to https://medium.com/@mhiratsuka/what-is-p5-js-and-how-to-use-it-b88f9fee0ab2 for using their images and review notes as reference*

**All rights reserved to https://www.geeksforgeeks.org/p5-js-introduction/ for using definitions and wording for reference**

Encouragement throughout your Career

All our dreams can come true, if we have the courage to pursue them.

The way to get started is to quit talking and begin doing.

When you believe in a thing, believe in it all the way, implicitly and unquestionable.

We keep moving forward, opening new doors, and doing new things, because we’re curious and curiosity keeps leading us down new paths. All our dreams can come true, if we have the courage to pursue them.

The way to get started is to quit talking and begin doing.

— Walt Disney

Design a site like this with WordPress.com
Get started